The Promise of Spring

The season starts with a dream and faith in the smallest seed.

Harbingers

Even after the harshness of winter, life prevails and surprises.

A pop of color.

Longer days and sunny skies bring a pop of color to brighten the early spring.

Wild times.

Even in the heart of the city, wild things abound.

Ephemeral beauty.

Some are visitors just passing through.

Showing posts with label Vegetable Garden. Show all posts

Wednesday, July 4, 2012

Bringing in the Harvest

The first flush of the summer harvest has begun! This past weekend we celebrated our very first full scale harvest of something besides the salad greens which we've been enjoying for a couple of months now. (And would still be enjoying if not for the groundhog...)

Here's a quick peek at our first haul:

Broccoli and Cauliflower
 It got SUPER hot here the past couple of weeks which caused the broccoli and cauliflower to start to head towards bolting pretty quickly. This is actually the "seconds" of the broccoli. We had harvested the main heads last week because of the heat.

Yellow Summer Squash
 The green squash got off to a slow start after it had to be replanted, but the yellow squash has been cruising right along. The one on the right is about the ideal size, the one on the left was let go a BIT too long. The problem with squash is that it seems to go from tiny to HUGE overnight!

Bush Beans
This is the first flush of the 2012 bean crop. I was actually surprised that these guys were ready to go before July 4th, but they were nice and plump. I've just finished the second planting of bush beans after the salad greens finished, but I had a few plants in just to bridge the gap before the climbing beans kick in. Speaking of climbing, the climbing beans and the winter squash are both going like crazy:


The tomatoes are really coming along now as well:


On the left, some Razzleberry Hybrids, and on the right some Zeebra heirlooms. (You can already see their stripes developing. After as slow start, the Romas are starting to ripen... just in time for the 4th!:


Wednesday, May 23, 2012

Reach for the Sky

Time for a quick veggie garden update. I managed to finally get the rest of the greens planted on Sunday... a week or two behind schedule but they should be fine. At the top of the picture you can see the early romaine lettuce is just about ready for harvesting. Jason will be happy! In the open spaces we'll soon have spinach, swiss chard, radicchio, and more lettuce. tucked into the straw at the top of the bed is the summer and winter squash and cucumbers as well as the okra and sun flowers. To the left all of the cole crops are still very happy and growing away!  The drip irrigation is on during this photo so you can see how well the set up is working.

The Greens Bed... circa 5/20 

Many of the early plantings are well on their way and so I spent most of the morning fashioning their supports for the season:

Tomatoes with stakes and arms in place.
I'm re-using my "Ultomato" stake system from the past few years... I do have to say that it has held up pretty well. The only complaint that I have is that I wanted to swap out the 5' stakes that it comes with with 6' stakes since half of the tomatoes I planted are indeterminate and when I went to do that I discovered that all of the new stakes available are a smaller diameter and the old arms were too big to grab them snugly. After several futile searches at various retailers I just solved the problem by wrapping each of the stakes with duck tape in the area that the arm needed to connect. Not the most ellegant solution, but working for now anyway. Hopefully by next year we'll have relocated the garden to the back, and at that point I'll devise a bit more permanent and re-useable trellis or support system . We'll see!


This is a shot of the egg plant and pepper bed... neither of which need staking just yet, but for some reason I do finally seem to have a few peas trying to make it up. They should have already been up and harvested by now, but they just weren't cooperating earlier in the season. I decided to just let the ones that came up keep going so I made some little tee-pees with some shorter stakes. Well have to see how that turns out. We may or may not ever actually get any peas... that still remains to be seen! Here's hoping!

And then my pièce de résistance (hopefully anyway!)... My bamboo bean trellis:
Bamboo Bean Trellis

In the past I've done single poles and used a round wire ring at the bottom and then strung twine from top to bottom. Since this bean patch is slightly larger and I'm doing three different types of climbing beans I decided to try something different. Instead of supporting 1 sq ft of climbers, each tee pee here will support 4 sq ft of beans. Then I connected the four at the bottoms on either side, the middle on either side, and the top. That gave me support for the twine to be strung up and down which ensures that the beans have plenty of surface area to work their way to the top. In the old set-up by the time the beans got to the top of the pole there the amount of surface area was so constricted that everything turned into a big jumbled mess. Even though there is still less room as they get to the top of this trellis, it still should give them a much better opportunity to space themselves out. I checked on progress today and the beans are all up and well on their way towards reaching up to the bottom rungs to start their ascents!


Thursday, May 3, 2012

Veggie Progress

I took advantage of the projected warmer weather this week to go ahead and plant out some of the veggie seedlings that have been waiting in the wings for the past couple of months... This week looked pretty safe... with May 5th the projected last frost date, and temperatures projected in the mid 70's to low 80's I figured I'd risk it this past Sunday and go ahead and get them in the ground. Of course no sooner had I finished with the peppers and eggplants then my weather alert went off on my phone predicting frost..... 

Tomatoes!!!!
Yup... those are my tomatoes that started off as little seeds in the basement a couple of months ago! They got so big so fast I had to eventually up-pot some of them into 1 gallon containers! A few of these guys even have blossoms already! I'm hoping for a smooth transition and an early harvest!!!


Eggplants and Peppers
 The egg plants are also well established at this point! The peppers are not quite visible at the far end of this bed... A bit of a debacle with the peppers... For some reason I didn't label each individual pot when I re-potted them from the seed starting trays. I guess I thought I'd remember which was which... Yeah, not so much! Oh well... so much for my strict planning and organization in this bed.... it will just be a "mixture" of peppers!

Tomatoes planted and mulched
Once everything was planted I mulched them in with straw. The open spaces are the turnips which are coming along nicely now. I kept the pots out for the night and used them to cover the tomatoes to protect them from the frost... Everything made it through the night without any issues! The only thing I realize now that I forgot was that I wanted to put some broken up egg shells in with each one for some calcium... but oh well! I'll have to just be sure to work some in.


Tuesday, April 24, 2012

Veggie Update!

Quick end of April update:

Cabbages, broccoli, cauliflower, and brussel sprouts all tucked in to their bed in the center of the new raised bed garden. They look pretty happy. (The stakes are to hold up the sheets in the event of a late-breaking frost.)

Cole Crop Bed
 In the new wooden grow house, which I'm loving by the way, the tomatoes are getting impatient and looking forward to their permanent home. In fact, this week's projected cold weather meant that I had to do some quick shuffling of shelves inside to make room for them since they are now too big to close the lid! I also had to  up-pot almost all of them from their 4" starter pots to some left over quart size pots since it looks like it will still be a couple of weeks before they can be planted out.


Saturday, February 25, 2012

And we're off!

First sprouts for 2012 - Artichokes Started 2/10

The very first seedlings are up and growing for the 2012 garden! The little guys above are my artichoke starts. These little guys will end up being about 2 - 3' spiky wonders! It is hard to believe that they get their starts as such innocent looking little sprouts. I planted multiple seeds per pot because the envelop said that artichokes are notorious difficult to sprout and get good seedling but it looks like I have multiple sprouts in almost every pot. started these guys in 4" pots so that I don't have to re-pot before transplanting them.

Here's what they'll look like eventually:

Photo by ChapmanLA

This week I also started my eggplants and the first round of romaine lettuce and endive. Currently we have to shelves up and partially running in seed central  thanks to Jason's handy wiring project. My project for later this weekend is to tap into the water pipes overhead to be able to water everything without having to go up an down the stairs constantly with my watering can.


Saturday, February 11, 2012

2012 Kick-Off


It is officially time to get to work on the 2012 garden. (Yes, I do realize that I missed most of 2011... I'll post a few additional snapshots a bit later on.)

Now that we'll actually be in the house for the entire planting season, I'm going back in action and getting the plans ready for our first full-fledged veggie garden. While the long-term master plan calls for the "working" garden to be at the back of the property, there is still a LOT of work that needs to take place to clear out the area so that it can house the garden. It is currently still very overgrown and has way too many trees to have enough light. That means that the current plan is to once again site the vegetable garden in the front of the house. 

The current plan calls for the creation of at least 6 new beds which will provide approximately 275 sq.ft. of planting space. Considering the garden at our old house topped out at about 100 sq.ft. it will be quite an increase. The beds will be just slightly raised unlike the beds at the old house which were up about 11 inches. These are eventually going to be converted to perennial beds, so I don't want them to be very high.

Here's the current planting plot...

2012 Planting Plan
As you can see, the overall shape is more or less a triangle, due to the shape of the space. The approximate location is indicated by the orange arrow on the very aspirational master plan below.  (It is side down in the plan view). The longest side borders the sidewalk to the front door. The three empty triangles are still TBD. They most likely will be paved and then hold either the concrete standards, potted plants, or may be planted out with standard roses and / or an arbor.

The "Master Plan"
Here's a current view of the "Master Plan". I'm working from front to back, so currently the only thing complete are the beds at the top right of the image which is the side that borders the street. (You can see the eventual long-term location for the veggie garden at the bottom right.) Of course this version of the plan does not take into account the CRAZY slope at the back of the lot, or the location of the massive trees that will eventually have to come down. You can at least get a feeling for what it might look like some day!


Monday, June 20, 2011

Recent Progress

Just realized that it has been more than a month since my last post.... In addition to some out of town travel, things have been pretty busy around the house. We're getting into some of the LARGER and more long-term outdoor projects at the moment, which means that the progress isn't as fast and quick to come as some of the early wins, but the pay-off's will be pretty good in the long term! Here's a quick look at a few of the more recent outdoor projects:
Astilbe near the back walk
The first "new planting bed" that I managed to complete was this tiny patch next to the sidewalk heading around to the back door. As you can see, it isn't a huge space, but had completely been taken over by weeds. It doesn't get much sun and stays fairly damp, so I figured it would be an excellent spot for some astilbe. I had originally thought about doing some hostas here, but the space was so narrow that I was concerned that they'd end up just flopping out all over the sidewalk. These three grand dames were snapped up on clearance at Lowes and are very happy in their new local!

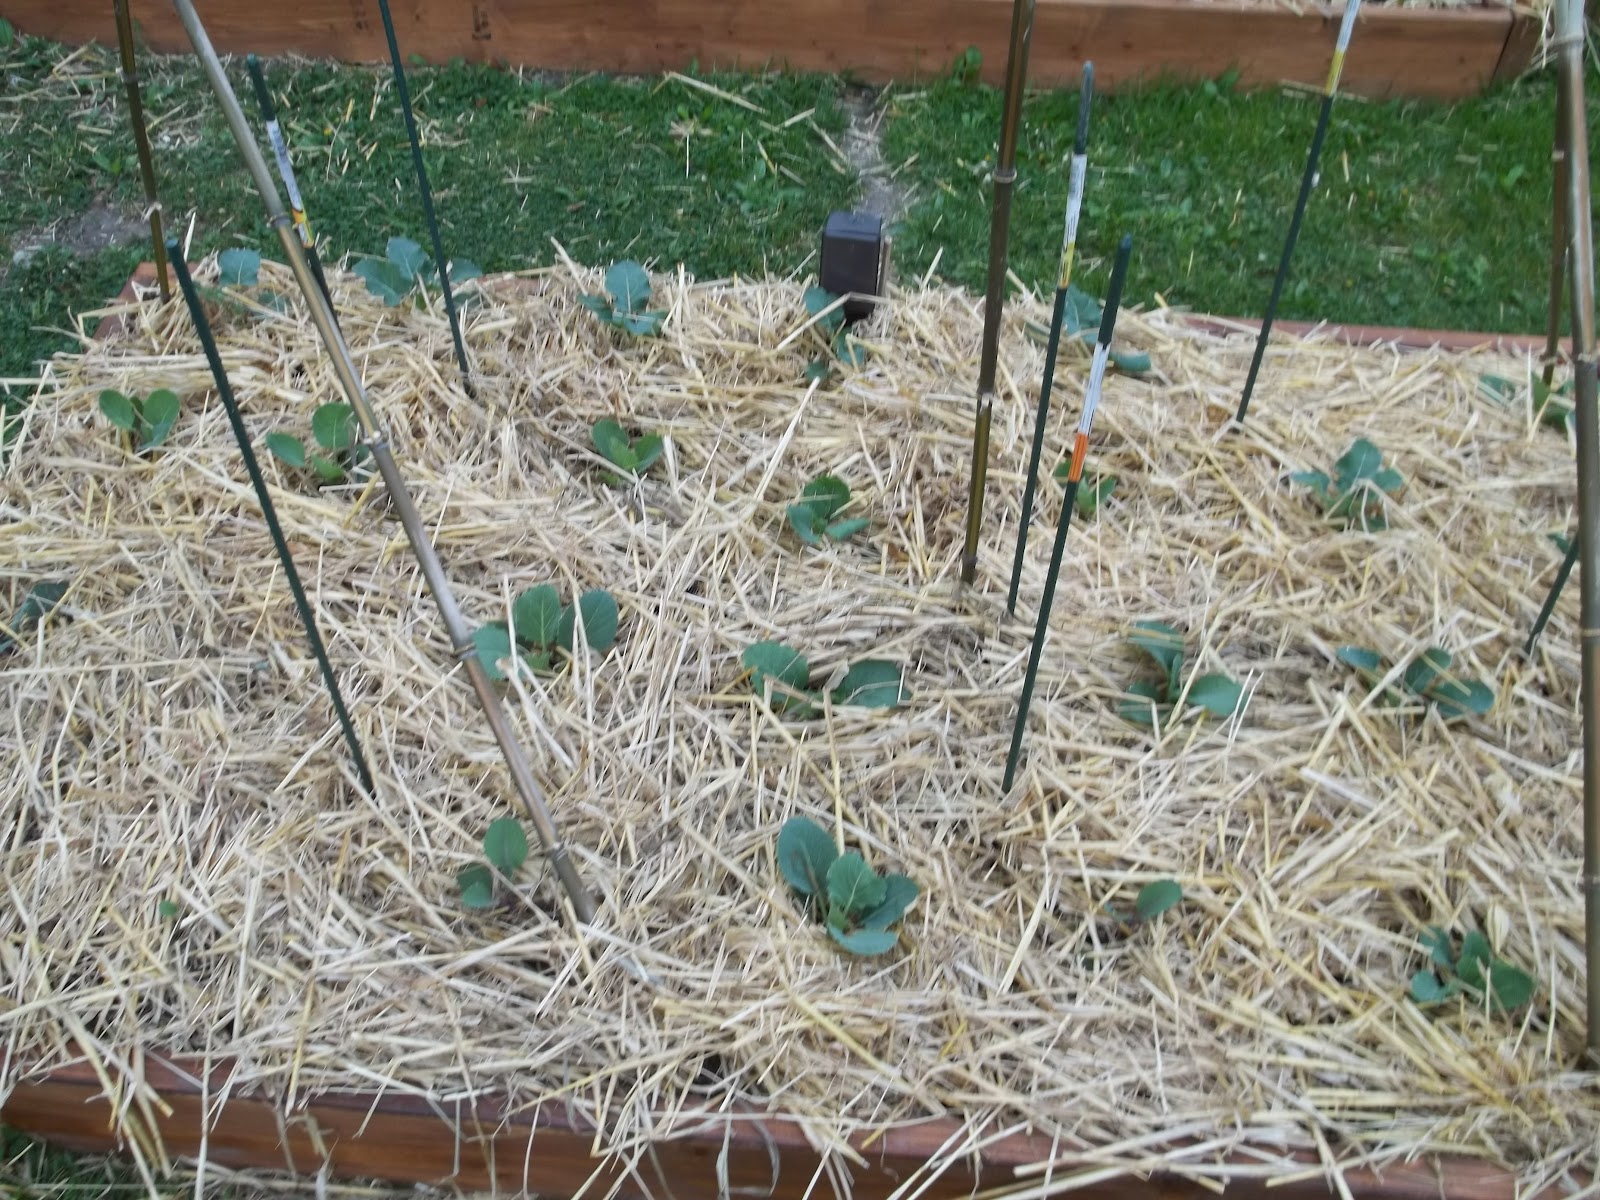
"Temporary" veggie garden
This decision met with some raised eyebrows from Jason, who wasn't sure how he felt about having veggies planted right out in the front yard. I assured him that this arrangement was just to get us through the current season since right now we lack any other suitable location. I didn't exactly have time to lay out and dig beds for an entire garden, and I wanted to have at least a few peppers and tomatoes this year. Lacking the cash-flow to actually complete landscaping of the front bed I decided that the best plan would be to temporarily put the veggies out there so it wasn't just a bare mulch spot for the whole summer. I managed to fit in a few tomato plants, a few peppers, and a cucumber, zucchini, and some herbs. (The GIANT hosta was already there and I didn't really want to move him until I know exactly what is going to be happening out here long term!)

East side shade garden
The third project was a general clean-up of the shade garden just off the parking area on the east side of the house. Again, it was mostly overgrown and run down after years of neglect. We also have a very bad drainage problem where all of the water off of the parking area ran right into this bed. Consequently the mulch (if there ever was any) from the bed had been washed away a long time ago and things were looking a bit ratty! I solved that problem by using some pot hole repair cold patch to build a small berm around the perimeter of the bed so that the water now runs down into the lawn without flowing through the bed. You can probably see it better if you click through to the full size photo.

The only other update here was the planting of my formerly potted hydrangea n the front center of the photo above. She's been in a pot for the better part of three years, so I'm hoping she likes her new permanent home! All of the other plants were already here, so mostly all I did was get rid of the weeds and then put down a nice thick layer or mulch. I'm going to be adding to this area eventually, but for now at least it cleans up the appearance of the side of the house.

You'll notice in the two later photos the pots up on the concrete plinths. I placed one of these on each side of the side entrance to sort of form the entrance way. The bases were found on the property. They're concrete and at one time were actually outdoor light fixtures of some sort. (There are a few other discarded ones yet to be excavated from the woods.) I thought it was a pretty clever way to reuse them with a bit of flair.

I've got a couple of other projects to share, but unfortunitely I had a slight file transfer malfunction, so I'll have to re-shoot a few pictures and share those later!